How to Transfer Audiobooks From iTunes to iPhone with iTunes
iTunes is an Apple’s app that helps you to manage or store your iOS device’s media data that can erase your original data on iDevice if you use the sync function. Once you have purchased and downloaded the audiobooks from iTunes it becomes easy to transfer audiobooks from iTunes to iPhone using iTunes.
Install the latest iTunes version in your computer and use a USB cable to connect your iPhone to your PC.
From the iTunes window, choose iPhone then click on the Audiobooks tab.
Click on the Sync audiobooks button then select the audiobooks you have downloaded.
Click on the Apply tab at the bottom right of the page to start the audiobook transfer process.

Limitations of Using iTunes to Transfer:
You cannot select the files you want to transfer; you can only sync all the files at once.
There is a limitation to the kind of audio and video format you can transfer.
During the syncing process, you may lose files if the files in your iPhone have not been purchased from iTunes.
It is only possible to sync audiobooks from one iTunes library to your iPhone or your iPhone is erased.
Sponsor ads:
Gihosoft Free iPhone Data Recovery:https://www.gihosoft.com/iphone-data-recovery-free.html
Gihosoft iPhone Data Recovery Free
Free iPhone Data Recovery Software for Windows/Mac
Recover up to 12+ types of files, including contacts, SMS, photos, WhatsApp, Viber, notes, etc.
Restore lost data from iOS devices directly or from iTunes and iCloud backup
Recover iPhone data lost due to iOS upgrade/jailbreak, accidental deletion, device lost or broken
Support all the latest iPhone, iPad and iPod Touch
Both Free and Pro version.
If you lost data after you updated to a new iPhone, you can always use Gihosoft iPhone Data Recovery to get the data back from the old iPhone or backup.You may also like: iphonerecovery.com
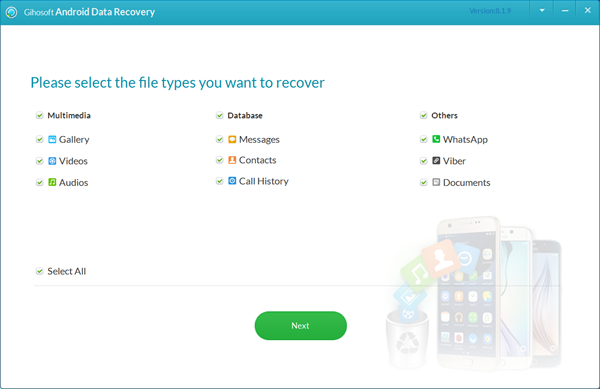
If you use android phones, please choose Gihosoft Android Data Recovery.
With Gihosoft Android Data Recovery, no longer afraid of data loss!
Worth reading:Best youtube downloader online download youtube 1080p